Liav Koren // artisanal electrons // handcrafted pixels.
Baylor College // Custom LED solution.
5 Oct 2013
Intro
This is a project I've been helping Mark Argo of Aesthetec Studio on this year. Aesthetec specializes in interactive installations for art and exhibition contexts, which is an area I'm particularly interested in. It's been a treat working with them — they're great designers and Mark has impressive hardware design chops.
Project Brief
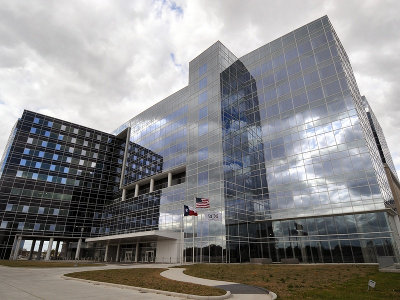
Baylor College of Medicine is a medical school with teaching hospitals in Huston, Texas. They're in the process of commissioning a new building.
Aesthetec won the contract for a series of LED signage display panels. The panels are high resolution LED elements — well, higher resolution than your average commodity red/green LED matrix. Picture elements are about 1mm in size. They're sold in small blocks that are 32 x 32 LED elements in size. Aesthetec's custom assembly is an array of 1 x 10 block (giving 320 x 32 pixels per row) mounted onto custom electronics and mounting hardware. This give you a nice sturdy modular LED strip with a small depth footprint. For Baylor these LED strips are then mounted into a frame behind Alabaster or wood veneer, allowing the light to diffuse through.
Each panel is driven by a RaspberryPi server which stores the current state of the panel, sends commands to the firmware and allows the College staff to do Create/Read/Update/Delete operations on the current and saved states for the panels.
Everything on the server upstream of the panel Display Driver was my responsibility. The interface to the Display Driver is an array of unsigned 32bit base 10 Ints which sequentially encode the state of panel when mapped to base 2. Each pixel gets its very own zero or one. It gets very satisfyingly low-level.
Design constraints
- The server will live on a RaspberryPi running Raspbian.
- Hospital staff (both primary users and IT) need to be able to access the webpage/server for each panel and get/edit/ save/publish message strings easily. IT wants to be able to ssh into the server and get at the message states. The panels are intended to be relatively static display elements -- more akin to signage systems that are intended to be updated once or twice an day or less. The panels do not perform animations.
- The number of message states to be saved at each panel is expected to be relatively small.
- The College is working with a graphic design firm to create an institutional identity. The panels need to be able to render whatever set of OpenType/TrueType fonts the College ends up using as part of its identity.
- The is more than one type of panel. From the server's perspective, the major difference is that panels can have different numbers of rows.
- Each row can display either one line of full-sized or two lines of half-sized text. As mentioned, the hardware is a matrix of 320 x 32 pixels. Full-sized text is rendered at approximately 28px high, half size text at approximately 13 px high.
- The development environment was somewhat mixed: at home I was working in Ubuntu 12.04. The workstation at Aesthetec was a mac running OS X 10.8.4. The target context is a Pi running Debian wheezy (Linux 7).
The Solution:
The framework
The target context plus the expected usage pattern suggested a relatively lightweight framework. We very early on decided to use flat-files to store message strings. My friend Rob Gilson had pointed me at the Tornado web server/framework last year and and I've been playing around with it for a while. It seemed like a particularly nice fit: lightweight, robust, relatively straight-forward to deploy, Python-based. One initial minor concern was that there doesn't seem to be a huge amount of documentation on it. The website docs are pretty good and a careful google search will generally turn-up something relevant, but the sense I've gotten is it doesn't have quite the massive amount of documentation some other frameworks do. However, it's also been correspondingly easier to work with. A copy of Introduction to Tornado was helpful at a couple of points.
One of the first things I did was a search to for Tornado + RaspberyPi, which turned up:
Since we've started this project a lot more Pi + Tornado projects have cropped up, but at the time, these were the best results I could turn up. This made me a little nervous, but Niltoid and MartinSant did both report success, so it seemed worth at least investigating Tornado. Once I got the Raspberry Pi it was really very straight-forward to install Tornado. Likewise on OS X. We decided to work with it.
The architecture
From my perspective, on the software level, the project is two modules: a Webservice (my bailiwick) which exposes views to users, performs operations on messages states and communicates with a Display Driver (Mark's bailiwick).
BCM is the first installation of this system. As mentioned, there's more than one type of sign -- the main difference is currently the number of rows per sign, but other differences such as length of rows are easily imaginable. It clearly made sense to generate the views dynamically based on the structure of the message. This worked well for the Baylor deployment and left some flexibility for future deployments of the system. The message scheme we ended up settling on was:
  {"current":
    {"header": header_info,
    "filename": filename,
    "data": [{"font_size": Large | Small,
          "content": [text_string1, text_string2]}]
  }}
This structure is then parsed by Tornado's templating language, text strings are injected into into the value fields of the input elements and the page is served to the user.
The Code
A few notes and comments on the code. I very much consider myself a journeyman programmer with much still to learn. I'm not presenting this code as an exemplar of how to do things but as documentation of how I did things, this time around.
Client side
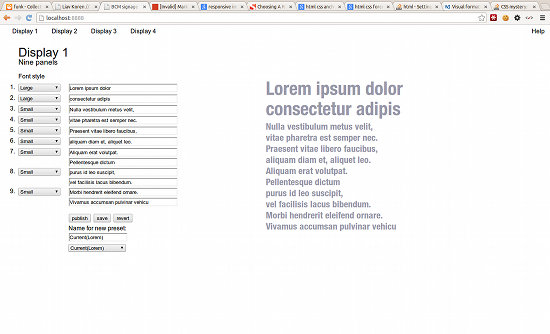
This was the first part to be done — even before we'd finalized our decision to use Tornado I could begin fleshing out the HTML, CSS and JS. The JS is extremely Functional -- there's a lot of user interaction that needs to be accounted for, but the html form itself does a lot of the heavy lifting in terms of maintaining state. In fact, the only state I needed to track was the relationship of the message strings the user was currently working with, relative to the server. This could be broken down to: *unsaved* (new or edited messages created by the user), *saved* (the message has been pushed to the server) and *published* (the message has been pushed to server and the server has pushed to the display panel).
Currently, state is communicated to the user by the color of the rendered preview text: dark gray = current published message; light-blue-gray = message saved; light-red-gray = unsaved. This is probably too subtle for deployment but so far it's worked well during testing. All this boils down to a nice, minimal state object:
  var message_state = {
    "published": "#444444",
    "saved": "#9999aa",
    "unsaved": "#887777",
    "current_state": "published"
  }
This allows me to update the message state and text color with
update_text_color(
   message_state[message_state.current_state])
which I thought was a nice, clean way of packaging both state and the information that travels with it.
As I was working on this element of the UI I got to the point were I wanted update in real-time with user changes. This is one of those things that seems like it should be straight forward, but can actually be fairly tricky. If you attach a onChange or jQuery .change listener to a form element, it only fires onBlur. You actually need to bind to .keyup, and even that won't catch things like cut and paste. I ended up using a jQuery plugin from zerb.com that deals with the issue, and was very happy with it.
One thing could definitely stand to be refactored in the current code is the way I'm binding listeners to the text fields. When the user selects a different saved message from the list of preset messages, the new message strings are AJAX'd off the server and jQuery'd into the page, which overall I'm very happy with. At the end of the process, though, the listeners need to be rebound to the text fields -- this could likely be avoided by a more careful targetting of parent elements that aren't replaced.
What I do like about the system is the way it meshes with the server-side templates. Templates are setup as outer and inner files. Outer contains both the header and footer html, up to the <OL> tags:
The template structure is, roughly:
#Form_outer.html
{% extends "form_inner.html" %}
    {% block top %}
      html
      .
      .
      <OL>
    {% end %}
    {% block bottom %}
      </OL>
      .
      .
      /html
    {% end %}
#Form_inner.html
      {% block top %}
         loop to create <LI>s.
      {% block bottom %}
What's nice about this setup is that when the user requests a new saved message, we make an AJAX call to /load, which the server fulfils by grabbing the relevant inner template and injecting the relevant message into it. This is a nice DRY and modular solution: the structure of the HTML is driven by the structure of the message string and the same code which renders the interface when going a GET to `/` renders the response when doing a GET query to `/load`.
Server side
When a user decides to publish a message a whole cascade of things happen. The message strings are parsed into Python Abstract Syntax Trees, which is a format that can be safely evaluated. The strings are then read and the Python Image Library is used to render black and white GIFs of each string at 320 x 32 pixels, in which ever TrueType/OpenType font face required. The final step in the pipeline is rendering these GIFs down to a format the DisplayDriver can handle, which is an array of 32bit unsigned Ints. It had been a while since I'd done any real bit-banging, but it's a pretty simple operation handled by a sets of nested loops like this:
  for y in range(height):
      val = 0L
      for x in range(width):
          val = val << 1
          if im.getpixel((x, y)) < 125:
              val = val | 1
          if (x+1) % 32 == 0:
              pixel_arrays.append(val)
              val = 0L
  return pixel_arrays
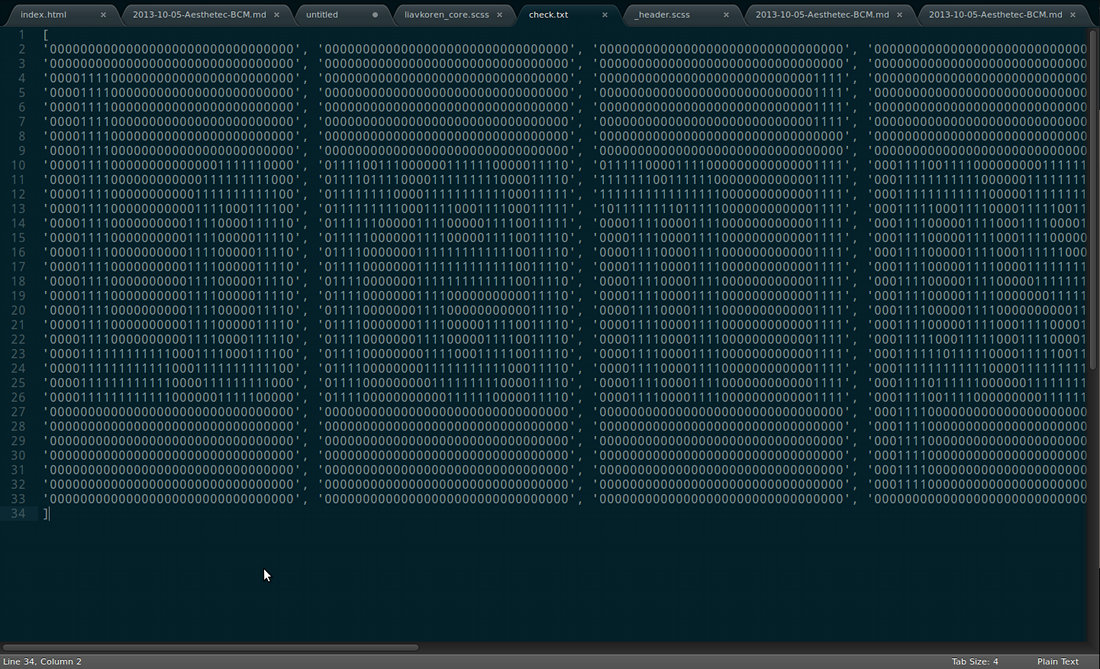
At the end of the process we also render out a check.txt file which has a human-readable base two version of the bit-frame (how often do the phrases "human readable" and "base two" appear in the same sentence?). My favorite line of code in the project lives in this check method. (Un?)fortunately(??) it has been slightly watered down, the victim(??) of a late-in-the-game streamlining of the datastructures. Initially we'd been constructing the bitframes at as multidimensional arrays. We finally settled on a flat array of longs, which meant that the list comprehension that generated the check.txt file also suffered a streamlining. For perversity's sake I'm archiving here the original version:
[newRow.append(bin(num)[2:].zfill(32)) for num in row]
Grab a number from the dataframe, convert it to base two, slice off the '0b' prefix, pad it out to 32 chars, append it onto newRow.
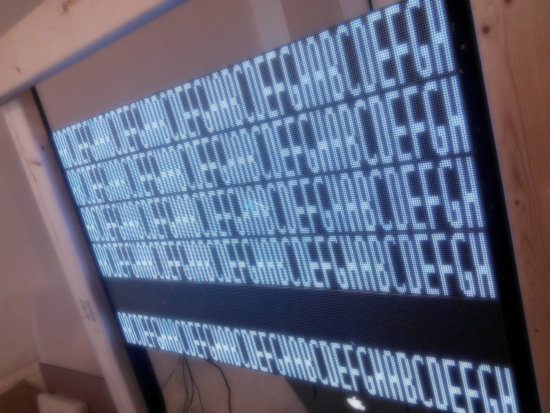
The result, once you've set line breaks correcly, is a nice, modern, high-performance/high-design TrueType font rendered down into binary ASCII banner art: